Ingredients:
Prepared sushi rice (see my instructions here how to make sushi rice frugally)
Nori seaweed wrappers (see note below for alternatives)
Fillings, such as:
- Carrots
- Onions
- Cucumbers
- Scallions
- Avocado
- Omelets
- Lox
- Canned tuna fish
- Mock crab
- Sushi grade fish
- Sweet potatoes
- Etc...
Condiments, such as:
- Soy sauce
- Wasabi
- Pickled ginger
- Spicy mayo
Alternative Ingredients Note:
Re: Nori wrappers- If you don't want to use nori (seaweed) as
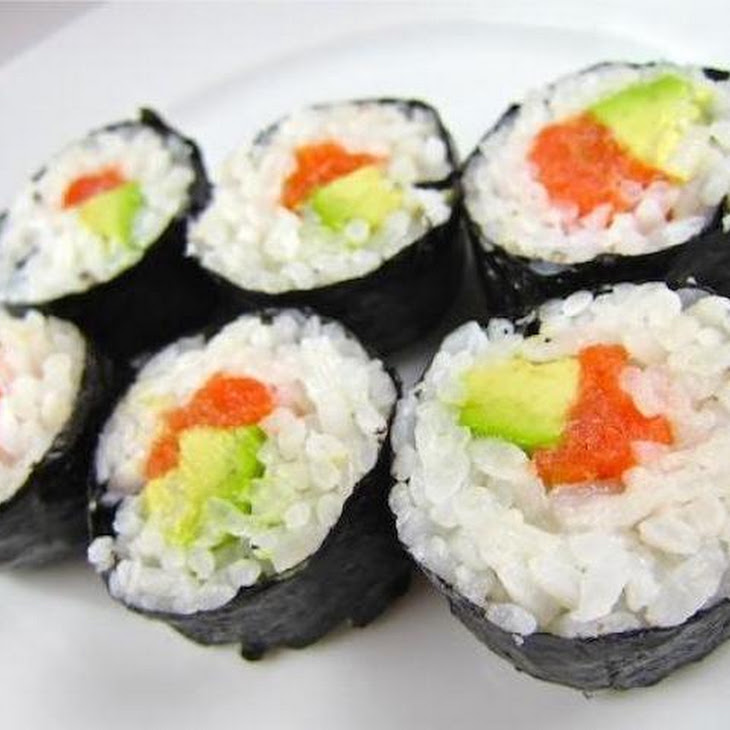
the wrapper for your sushi because it is too expensive, because it isn't
available locally, or because you don't like the taste, you can also
use rice wrappers soaked in water for 30 seconds, a very thin omelet, homemade crepes (leave
out the sugar and replace the milk with water if using that recipe), or
lettuce leaves, collard green leaves, kale, or Swiss chard.
Re: Sushi rice- the recipe I've included for homemade sushi
rice includes white sugar, which I've cut out of our diet for health
reasons. To make this more healthy, you can substitute honey (in a 1:1
ration) for the white sugar in the recipe and it tastes just as yummy,
and is healthier. Yes, the recipe includes white rice, but according to
certain traditional and paleo/primal foods websites I've read, of
grains, white rice is actually the most neutral and easily digestible
and if you're going to include one grain into your diet, its a good idea
for it to be that one, so I don't feel bad about recommending its use
in a recipe. However, if you avoid white rice, sushi can be made with
brown rice or quinoa or even things like parsnips
(!!!), but as their texture is very different from the sushi rice I
make, I can't guarantee that you can make rolls with those using my
instructions, but you're invited to try.
Re: Condiments-
I use gluten free soy sauce, purchased pickled ginger, and purchased
wasabi paste, but I would like to try making the recipe I've seen for
healthier homemade pickled ginger, I just haven't done so yet. You can
also make spicy mayo, but I've never done it.
Re: Fish- A fish store just opened up near me that sells sushi
grade salmon. It isn't so cheap per pound, however, I asked them to
slice the 2 pound fillet of fish into 6 pieces. Because of safety, to
kill potential parasites, you're supposed to freeze sushi fish for at
least 2 weeks before using it, so I just used one piece of the salmon
for a whole meal of perhaps 10 sushi rolls, and saved the rest for
another sushi making session. Even though the salmon is still expensive
per pound, because you don't need so much fish for your sushi, you don't
need to spend so much even on sushi grade salmon for your sushi if you
go that route. If you don't have access to sushi grade fish, you can
also use cooked fish in your recipe or leave out the fish entirely.
Equipment:
Bamboo sushi mat (a one time expense, and you can buy this very cheaply

)
Plastic wrap (recommended but not necessary, just makes clean up easier,
and helps if using something other than nori to wrap your sushi)
Serrated knife
Instructions:
1. Wrap your sushi mat completely with plastic wrap so that it is
entirely covered and has no bamboo exposed, but make sure that your mat
is still flexible. (If you're an experienced sushi maker, you can skip
this, but I don't recommend that to a novice.)
2. Make sure your sushi rice is room temperature- if your sushi rice is
hot it won't stick as it should. Note- you don't want to have
refrigerated your sushi rice either- once refrigerated its consistency
changes- make your sushi rice a few hours in advance so it has time to
cool down but doesn't need to go in the refrigerator.
3. Prepare your sushi fillings. In restaurants, the carrots they use are
generally raw, but my mom taught me how to make the carrots even
yummier for sushi. Take carrots, onions, and fresh ginger and peel them
all.
4. Slice your onion into rings, and cut your carrots into thin
matchsticks, each a few inches long, and cut your ginger into very tiny
pieces.
5. Saute your onions in oil until translucent, then add carrots and ginger, and cook until soft. Set aside to cool.
6. Prepare the rest of your sushi filling. You want them to be cut into
uniformly sized pieces, each approximately the same length, and of a
consistent width throughout. In the picture below you can see
the sauteed carrots with onions and ginger, avocado slices, cucumber
sticks, strips of egg omelets, and scallions.
7. Lay 1 sheet of nori (or whatever other wrapper you're using) on your sushi mat.
8. Wet your hands thoroughly (but be careful not to drip water on the
nori, as it will make it sticky and ruin it), and take some sushi rice
from the pot, and press a thin layer of rice onto the bottom 1/2 to 2/3
your nori. Don't just place the rice down, you need to mush it down onto
the seaweed.
When doing this, its important to note that your sushi rice needs to be a
uniform thickness throughout the entire area covered with rice,
otherwise your sushi won't hold together nicely (it will be lumpy or too
loose and your fillings will likely fall out). Make sure the top edge
of the rice is a straight line, and make sure the edges and corners of
the nori aren't neglected. You may find the rice starting to stick to
your fingers as you do this. If so, wash the rice off and then take some
more rice using your wet hands. The water will stop the rice from
sticking to your hands.
9. This is what your nori should look like once you've covered it with
your rice. Note that the rice reaches all the corners and edges. Also be
careful that no rice gets on the upper portion of the nori, or this
will stop your sushi from sticking together nicely.
10. Once you've covered the required portion of the nori with rice, use a
finger to make an indent in the rice in a straight line towards the
bottom middle of the rice, as in the pictures.
11. Lay your fillings in the indent in the rice, making sure that you
are putting the same amount of filling across the whole thing, that
there isn't one side or part with a thicker layer of fillings, as this
will cause problems when trying to make your roll stay together. Again,
I'll repeat, the most important rule when making sushi maki is that
everything needs to be uniform and consistent, otherwise the roll won't
hold together nicely. I like to put in as many fillings at once,
especially if I'm not using fish, as it adds more flavor, but feel free
to do it as you choose.
12. Use your fingers to hold the fillings in place, and stick your thumbs under the bamboo mat.
13. Continue to use your fingers to hold the fillings in place, but now
start trying to roll the rice on the nori that's closest to you with
your thumb. You want to make this as tight as possible, and you want
that edge of the rice to meet the farther edge of the rice, where it
meets the nori. Of course, you'll need to remove your fingers from the
filling, but try to do this at the last possible moment.
14. After you've brought one edge of the rice to meet the other edge of
the rice, and you have some nori flat on the mat, you want to tighten
your roll and make sure it isn't too loose by pressing down on the part
of the sushi mat that is touching the uncovered plain nori.
15. Unroll the sushi mat, and using your fingers, tightly roll the roll
the rest of the way until you have a cylinder of sushi roll. If you're a
novice, dab a tiny drop of water along the edge of the nori before
rolling it up- this will help the seaweed stick to itself.
16. Roll the sushi roll in the bamboo mat loosely from the further end
of the bamboo mat, rolling it towards you instead of away from you as
you were doing before, until your sushi roll is surrounded entirely by
bamboo. Up until now, in all the steps you wanted everything to be as
tight as possible, but this specific step you should make sure to do
loosely enough.
17. Wrap your hands around both sides of your sushi mat/roll, and press
firmly. This is how you're making sure that everything will hold
together nicely and it won't fall apart. Don't press too hard though, or
your rice and fillings will likely squirt out the sides. Make sure
you're pressing both sides evenly, or the same thing will happen.
18. Unroll your mat to reveal your perfectly beautiful sushi maki roll. Front view.
Side view.
19. Using a clean, serrated knife, cut your roll in half and move your
roll like this, with both newly exposed ends facing the same direction.
Try to find the seam of the nori, and put that side up, and cut directly
into that when cutting. This will help your roll not unravel while
cutting it.
20. Using your knife, try to smush back in whatever came out of the other ends of the sushi when rolling it.
21. Cut off the "less pretty" ends first. You can either eat them now or
serve them with your sushi. I tend to do the former, as it ruins the
presentation of the final product because they generally look less than
perfect unless you're a REAL expert. (My having made sushi rolls at
least a hundred times in my life doesn't make me enough of an expert for
that.)
22. Use your knife to cut the rest of the sushi roll into uniform
pieces. Be gentle with the knife and use a back and forth motion (that's
why you need a serrated knife for this) so you don't end up squeezing
the rice and filling out of the roll when cutting it. If the knife gets
dirty and covered in rice, it won't cut as neatly or as well, so you
might want to clean the knife one or two times while cutting the roll.
23. Flip the sushi upright to expose the beautiful filling on the
inside. Note how the fillings are pretty centered, and how the nori is
all on the outside? I personally don't like how sushi looks when its
made into a spiral,
as it is when many novice sushi makers make it. This way looks like
like how it is made when served in restaurants, in my opinion.
24. Serve with pickled ginger, wasabi, soy sauce, or whatever other condiments you enjoy.
Source:http://www.pennilessparenting.com/2011/11/homemade-sushi-recipe-and-tutorial-maki.html